Excercise:
Choose
one image which is available in JPEG and RAW which needs some adjustments. Then
use your processing software to adjust both images to a satisfactory state.
JPEG
·
Set
the black point and white point
·
Assess
and adjust the brightness of mid tones
·
Assess
and if necessary adjust the contrast
·
If
necessary make corrections to localised areas.
RAW
·
Set
the black and white points using Exposure
·
Assess
and if necessary adjust the brightness of the midtones
·
Assess
and if necessary adjust the contrast
·
If
necessary make corrections in localised areas
---------------------------------------------------------------------------------
JPEG
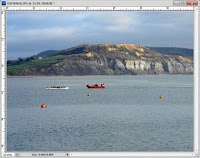
Original JPEG Image
 |
| Original Image |
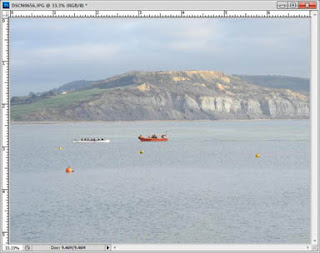
Here’s
my original image above taken in January 2012.
The whole image is very low key apart from the two boats in the middle
section.
JPEG
Procedures
Firstly,
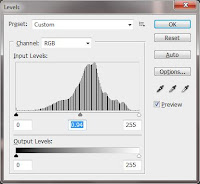
I opened Levels and you can see the original settings below.
I set the sliders to be
nearly touching the main parts of the histogram
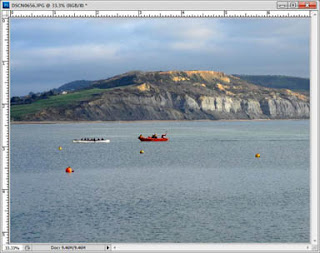
This changed
the image to look like the one below:
 |
| Black and white sliders adjusted |
Now
I changed the midtones using the Levels again; you have to be careful not to
overdo it as the image can look unnatural.
 |
| Mid tones adjusted |
See
how the new picture has more definition in the colours and the bluish haze has
been removed.
 |
| Mid tones adjusted |
Compare the two images
The original
image is pale and has a bluish haze; the final adjusted image has a much more
interesting colour and definition.
 |
| Original image |
 |
| Levels adjusted image |
RAW
Original RAW Image
The original image in RAW which
you can see below through the RAW Plugin converter in Photoshop CS5:
If
I change the setting from default to Auto Adjust you can see quite a dramatic
change to the image:
The
settings have changed as follows:
·
Exposure from 0 to -0.10
·
Recovery from 0 to +1
·
Blacks from 5 to 70
·
Brightness from +50 to 0
·
Contrast from +25 to +50
If I
change the settings manually one at a time you see the following changes:
·
Adjust the black point and the white
point by adjusting Exposure:
The red warning areas have come on to indicate that
there was very little detail on the side of the white rowing boat and the
yellow buoys. I moved the scale to +70 on the Recovery slider and this retrieved
enough information to eliminate the red, blown areas, see above.
·
Assess and if necessary adjust the brightness
of the mid-tones:
I
adjusted the Exposure to correct the mid-tones and found that by taking the
reading up to -1.00 it made the whole image darker but this was corrected in
Contrast when I changed the reading to +86.
·
Assess and if necessary adjust the
contrast. Experiment with both Contrast:
·
Assess and if necessary adjust the
contrast. Experiment with Tone Curve:
I
changed the Highlights, using Tone Curve, to -43 but had to decide how much to
reduce as, when I took it too far to the left, some of the figures took on
a blue hue when they should have been black.
I made the Lights +46 as this lifted the image and although it looks
dark in the screen shot above, it is considerably lighter when saved as a TIFF
or JPEG file.
I
changed the Darks to -12 and I altered the Shadows only slightly to -15 as too
much darkened the picture too much.
I
saved it as a TIFF file in case I wanted to make any further corrections using
Levels or Shadows/Highlights, but this is the final image from the RAW file.
To
compare the two sets of images, here is the final RAW image on the left and the
final JPEG image on the right.
 |
| JPEG final image |
 |
| RAW converted final image |
Whilst
the RAW image is still slightly darker than I would like I managed to retrieve
much more detail using the RAW converter software than by using Levels and
Shadows/Highlights for the JPEG image. i can adjust the darker image using Levels.


